How to Grow Potatoes in Containers
Tips for successful growing in our Potato Grow Bags or any container
Planting potatoes in containers is an easy and effective way to get a bountiful harvest of garden-fresh potatoes.
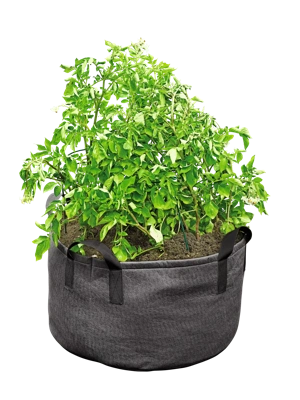
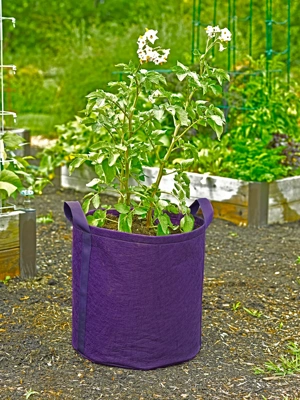
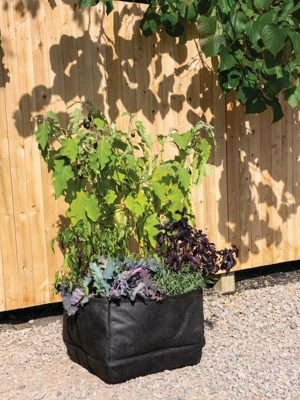
Our Gardener's Best Potato Grow Bags are specialized fabric "pots" that make it possible to grow potatoes in almost any sunny location — on a deck or a porch, or even a balcony!
What You'll Need on Planting Day
- Container: There are plenty of great options for containers, but our Gardener's Best® Potato Grow Bag and Gardener's Best® Jumbo Potato Grow Bag are specially designed with potato growing in mind.
- Seed potatoes: You can buy them from us or provide your own. Explore potato varieties to choose the best for your needs. Our regular Potato Grow Bag holds three to five pieces; the Jumbo Potato Grow Bag holds seven to 10.
- Soil: The regular Potato Grow Bag holds 50 quarts; the Jumbo Potato Grow Bag holds about 120 quarts. If you like to use your own fertilizer, we recommend our Organic Raised Bed Mix (20 qts.), Potting Mix or Organic Potting Mix.
- Granular fertilizer: We recommend our All-Purpose Fertilizer.
- Water
6 Steps for Planting Potatoes in a Grow Bag
The trick to growing potatoes — and the fun part — is filling only a portion of your container with soil, letting your potato plants grow, then adding a few more inches of soil at a time (this is sometimes called "hilling" your potatoes), covering about a third of the stem each time, until your soil reaches the top of the container. This unsual technique encourages the plants to make lots of potatoes, which form along the buried portions of stems.
1. Pick the Site
Plant potatoes when the danger of frost has passed. Not sure of frost dates in your area? Contact your local Cooperative Extension Service or Master Gardener's Program. Select the sunniest site possible. All-day sun is best, but as little as 6 to 8 hours will do. Keep in mind that you will need to water the Potato Bag regularly, especially if rainfall is insufficient.
2. Prepare the Soil
Put the soil in a wheelbarrow or tub that can hold it all at once. If you've chosen potting mix that does not have fertilizer in it, add granular fertilizer. Moisten the soil and mix thoroughly. Only about one-third of the soil will get used on planting day. The rest will be used as the plants grow. Set it aside.
3. Prepare the Seed Potatoes
Cut the seed potatoes into five 2-ounce chunks — about the size of a lime. If your seed potatoes are small, you can plant them whole.
4. Plant Your Potatoes in the Grow Bag
Fold down the top edge of the bag to form a 4" cuff. Fill the bag with the moistened soil mixture until it's about 4" deep. Place the seed potatoes on the soil surface, spaced evenly. Cover with another 3" of soil.
5. "Hill" Your Potato Plants, Covering with More Soil
Once the plants have grown to about 8″, it's time to "hill" your potatoes, adding enough soil to bury about one-third of the height of the main stems. Unfold the edge of your grow bag, add about 4" of the soil mixture, then water in thoroughly. It's OK if some of the foliage gets covered — any buried stems will begin producing more potatoes.
6. Repeat, Adding More Soil Every 8" of Growth
Allow the plants to grow, adding another few inches soil after they've grown another 8″. Repeat the process until the soil reaches the top of the container or you run out of soil mixture.
How to Care for Potato Plants
Water regularly: The porous fabric allows the Potato Bag to breathe, which prevents overheating and overwatering. However, it's important to monitor the moisture level in the bag because it can dry out quickly. The soil should feel moist, not soggy. In the hottest part of the summer, it might be necessary to water every day.
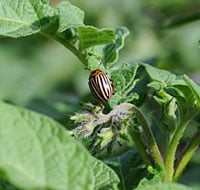 Colorado potato beetle
Watch for pests: Colorado potato beetles are the most common pest. Inspect your plants regularly, looking under the leaves for the clusters of yellow eggs. If you see them, rub them off with your finger. Adult beetles are easy to identify — and control: Just pick them off with your hands and toss them into a bucket of soapy water. The beetles might bother your plants for a few weeks; just keep monitoring and hand-picking and your plants will be fine. For more options, read Controlling Colorado Beetles.
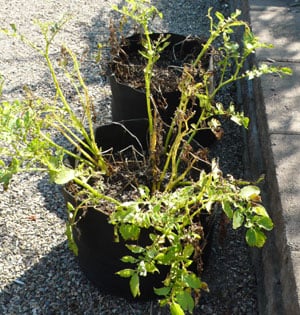 Potato plants usually look pretty shabby just before it's time to harvest.
How to Harvest Potatoes
1. Look for the signs
Pay attention to watering and your plant will flower and grow vigorously through the summer. Toward the end of the season, however, the leaves will start yellowing and the stems will wilt. At this point, stop watering and wait a week or two. After that, the potatoes are ready to harvest.
2. Empty the Grow Bag
Empty the bag — plants, soil and all — into a wheelbarrow. Dig through the soil and pull out the potatoes. You can expect to harvest about 7 lbs. of potatoes, although you could get as much as 13 lbs. in a good year. Add the old soil to your garden or compost pile. Clean out the bag and save it for next year.
How to Store Potatoes
Curing your potatoes hardens their skin and prepares them for long-term storage. Read about this simple process, our recommendations for where to store your potato harvest, and some helpful harvest storage products in our "How to Store Potatoes" article.
Related Articles
Last updated: 03/18/2024
Print this Article:
Related items
Get the Dirt
Stay up to date on new articles and advice. Please fill out the information below.


